Scrap-Busting DIY: Make Your Own Fabric Coasters!
Share
Looking for a quick and satisfying sewing project that helps you use up those beloved fabric scraps? These adorable coasters are the perfect solution! Not only are they a breeze to make, but they also make fantastic gifts or a stylish addition to your home. Here’s how to whip up your own in just a few steps.
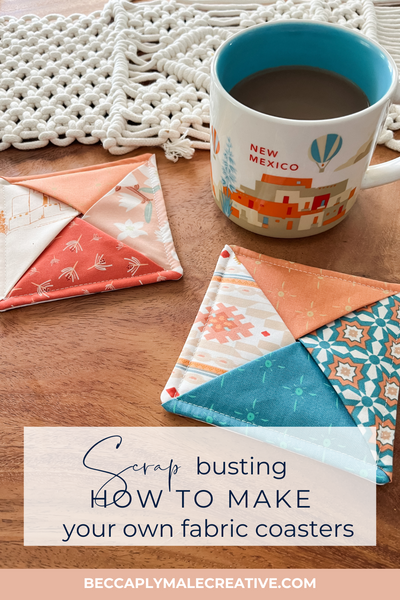
What You’ll Need:
• 6 Fabric Squares: 5” x 5” each
• 1 Batting Square: 5” x 5”
• Pins or Clips

Let’s Get Sewing!
Step 1: Create Your Base
Start by basting the batting to one fabric square. This will form the sturdy middle of your coaster. Flip it over and baste a second fabric square to the other side of the batting, creating a “sandwich.”

Step 2: Fold Your Triangles
Take the remaining fabric squares and fold each in half diagonally, wrong sides together, to form triangles.

Step 3: Layer Your Triangles
Lay two folded triangles on your fabric “sandwich” so their folded edges meet in the center.

Place the next triangle at one of the remaining corners, and finally, fold the edge of the bottom triangle up and over the last triangle. This will create a layered, interlocking effect.

Step 4: Secure and Stitch
Pin or clip your layers in place. Sew around the entire square using a ¼” seam allowance.

Step 5: Turn and Press
Trim the corners carefully to reduce bulk.

Then, turn your coaster right side out through the center opening. Use a point turner to get crisp, sharp corners, and press everything flat.

Step 6: Topstitch for the Finish
To give your coaster a polished look, topstitch around the edge. This not only secures the layers but also adds a decorative touch.

Why You’ll Love This Project
• Scrap-Friendly: Perfect for using up small pieces of fabric.
• Quick and Easy: Make a set in under an hour!
• Gift-Worthy: Pair with a mug and some tea for a thoughtful, handmade gift.

Whether you make just one or a whole set, these coasters are sure to bring charm and practicality to any space. Have fun sewing, and don’t forget to share your creations with us on Instagram! Use #ScrapFabricCoasters to show off your fabulous work!
Happy stitching!

1 comment
Thank you so much. A coworker had her mother-in-law make each of us here at work one and I love it. I wanted a partern so that I can make one for the ladys at chuch. I don’t have a good memory and I am over the moon happy. Thank you