Foundation Paper Piecing 101: Tips for Beginners
Share
If you’ve ever admired the crisp lines and intricate designs of foundation paper piecing (FPP) but felt too intimidated to try it, you’re not alone! I remember when I first dipped my toes into FPP—it looked so complex, but once I started, I was hooked. Today, I’m sharing beginner-friendly tips and techniques to help you conquer foundation paper piecing with confidence.

What is Foundation Paper Piecing?
Let’s start with the basics. Foundation paper piecing is a quilting technique where you sew fabric pieces onto a paper template in a specific order. The paper acts as a guide, helping you achieve sharp points and intricate designs, making it perfect for detailed or geometric designs that might seem tricky otherwise. Think of it as paint-by-numbers, but with fabric and a sewing machine!
Supplies You’ll Need
Before you begin, gather these essentials:
• Paper: Use lightweight paper, like newsprint or specialty FPP paper, that’s easy to tear. But honestly, regular printer paper works perfect!
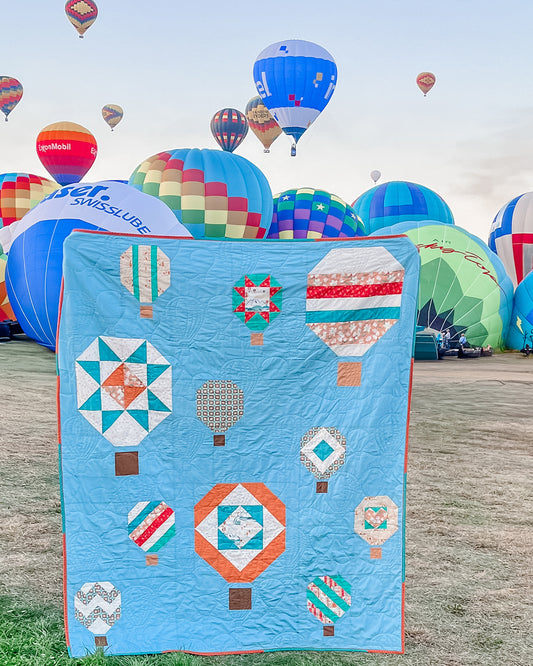
• Templates: Many quilt patterns, like Sandia Sunset, provide FPP templates, or you can design your own.
• Fabric scraps: Choose light-to-medium-weight cottons that are easy to press and sew. FPP is perfect for using up those smaller fabric pieces.
• Add-a-Quarter ruler: This handy tool makes trimming seam allowances a breeze.
• Rotary cutter and cutting mat: For precise fabric cuts.
• Glue stick or pins: To secure your first fabric piece to the paper.
• A sewing machine: Set with a shorter stitch length (around 1.5). This makes removing the paper easier later.
• Iron: A must-have for pressing seams flat after sewing each piece.
• Seam roller (optional but handy): Great for pressing seams quickly without needing to stop and iron every step.
Tips for a Smooth Start
1. Start Small
Begin with a simple pattern that uses straight lines , small blocks, and fewer fabric sections. The Sandia Sunset quilt pattern has all of this and is the perfect project to get you started in your FPP journey!

2. Read the Pattern First
Before cutting or sewing, review your pattern to understand the order of construction. Most patterns will be labeled with numbers indicating the sequence in which to sew the sections. Some even include fabric color labels to help you stay organized and avoid mix-ups. Taking the time to study the pattern upfront will save you from unnecessary frustration later.
3. Work Backwards
This might feel a little backward at first, but remember: the fabric is sewn on the back of the paper, and the final design emerges on the front. It’s so satisfying to watch your design come to life as you flip and sew each piece into place!
4. Practice Seam Placement
To avoid misalignment, fold the paper on the stitch line and preview where the fabric will land before sewing.

5. Cut Fabric Pieces Bigger Than You Think
As a beginner, it’s tempting to cut fabric pieces exactly to size. Resist the urge! Oversized pieces give you wiggle room to ensure your fabric covers the section completely when flipped. In the Sandia Sunset pattern, I have don't this for you, providing a cutting chart to ensure your pieces overlap enough.

6. Press, Don’t Iron
Press your seams flat with an iron after sewing each piece. Avoid dragging the iron across the fabric to prevent distortion. If you prefer, a seam roller can be a quick alternative for pressing between steps.

7. Trim as You Go
After sewing each piece, use the Add-a-Quarter ruler to trim the seam allowance to a neat ¼”. This step keeps your block tidy and makes piecing the sections together easier.

8. Use a Lightbox
A lightbox (or even a sunny window) can help you see through the paper to ensure your fabric is correctly positioned.

9. Remove Paper Gently
Once your block is complete, carefully tear away the paper along the perforations. Tweezers can help with stubborn bits.

10. Practice Patience
FPP takes time to master, so give yourself grace! Mistakes are part of the learning process, and with every block, you’ll get better.
The Basic Process
1. Place Your Fabric:
• Start with the fabric piece for section #1. Place it on the back of the paper so it covers the entire section plus a ¼” seam allowance on all sides.
• Lay the fabric for section #2 on top of the first piece, right sides together.

2. Sew on the Line:
• Flip the paper over and stitch directly on the line between section #1 and #2. Use a short stitch length (1.5mm) to perforate the paper, making it easier to remove later.


3. Trim the Seam Allowance:
• Flip the paper back and fold it along the seam line. Trim the excess fabric to leave a ¼” seam allowance using the Add-a-Quarter Ruler.

4. Press and Repeat:
• Open the fabric for section #2, press it flat, and repeat the process for the remaining sections.

Why You’ll Love Foundation Paper Piecing
Once you get the hang of it, FPP opens up a world of possibilities. You can create intricate patterns that would otherwise feel impossible, and your projects will have those sharp, professional lines we all love. It’s a game-changer for adding detail and personality to your quilts.
Pattern to Try
To get started, you can download the beginner-friendly FPP pattern: Sandia Sunset Quilt Pattern. It’s a simple yet delightful project that’s perfect for learning the basics!
(photo of Sandia Sunset pattern)
Foundation paper piecing might seem intimidating at first, but with practice, it becomes an enjoyable and rewarding quilting technique. Have fun experimenting with different patterns and watch your skills soar!
Do you have FPP tips to share? Let me know in the comments below or send me an email—I’d love to hear from you!
Happy sewing,


